


Home / Issuing / Quick Start Templates
Commercial Charge
Your Card Product will define the required Application fields for credit risk underwriting and identity verification. These checks must pass in order to onboard Commercial Charge Account Holders.
Commercial Charge Card Products allow you to issue lines of credit to your customers. The COMMERCIAL_CREDIT_PAY_IN_FULL product does not charge interest and requires your customers to pay their statement balance in full by the due date of each billing cycle.
Credit Card Products not backed by an Account Holder’s secured deposit will require you or a debt facility to provide sufficient capital based on the lines of credit extended to your customers.
In the Test Environment, you can create a Commercial Charge Card Product from the Highnote Dashboard or with the createCardProduct mutation in the Highnote GraphQL API. When creating your Credit Card Product, use COMMERCIAL_CREDIT_PAY_IN_FULL as the vertical input variable:
For Commercial Charge Products, you can simulate a deposit into your Product Funding Account in the Test Environment. These funds allocate credit lines to your Account Holder's Financial Accounts. Simulating deposits does not require you to connect an external bank account.
To deposit funds, you must first find your Product Funding Financial Account ID using the following query:
With your Product Funding’s Financial Account ID, you can simulate a deposit via WIRE. Afterward, you can set the credit limit for the Account Holder’s Financial Account once issued.
The memo field displays what typically appears on a given transfer. In the Live Environment, you won’t have the ability to control the memo field as there are specific guidelines on how WIRE and ACH appear to an Account Holder. In the Test Environment, you can edit the meme field.
The SimulateDeposit mutation will set the Available Credit for your Commercial Credit Product Funding Account. Use the following mutation to simulate a deposit:
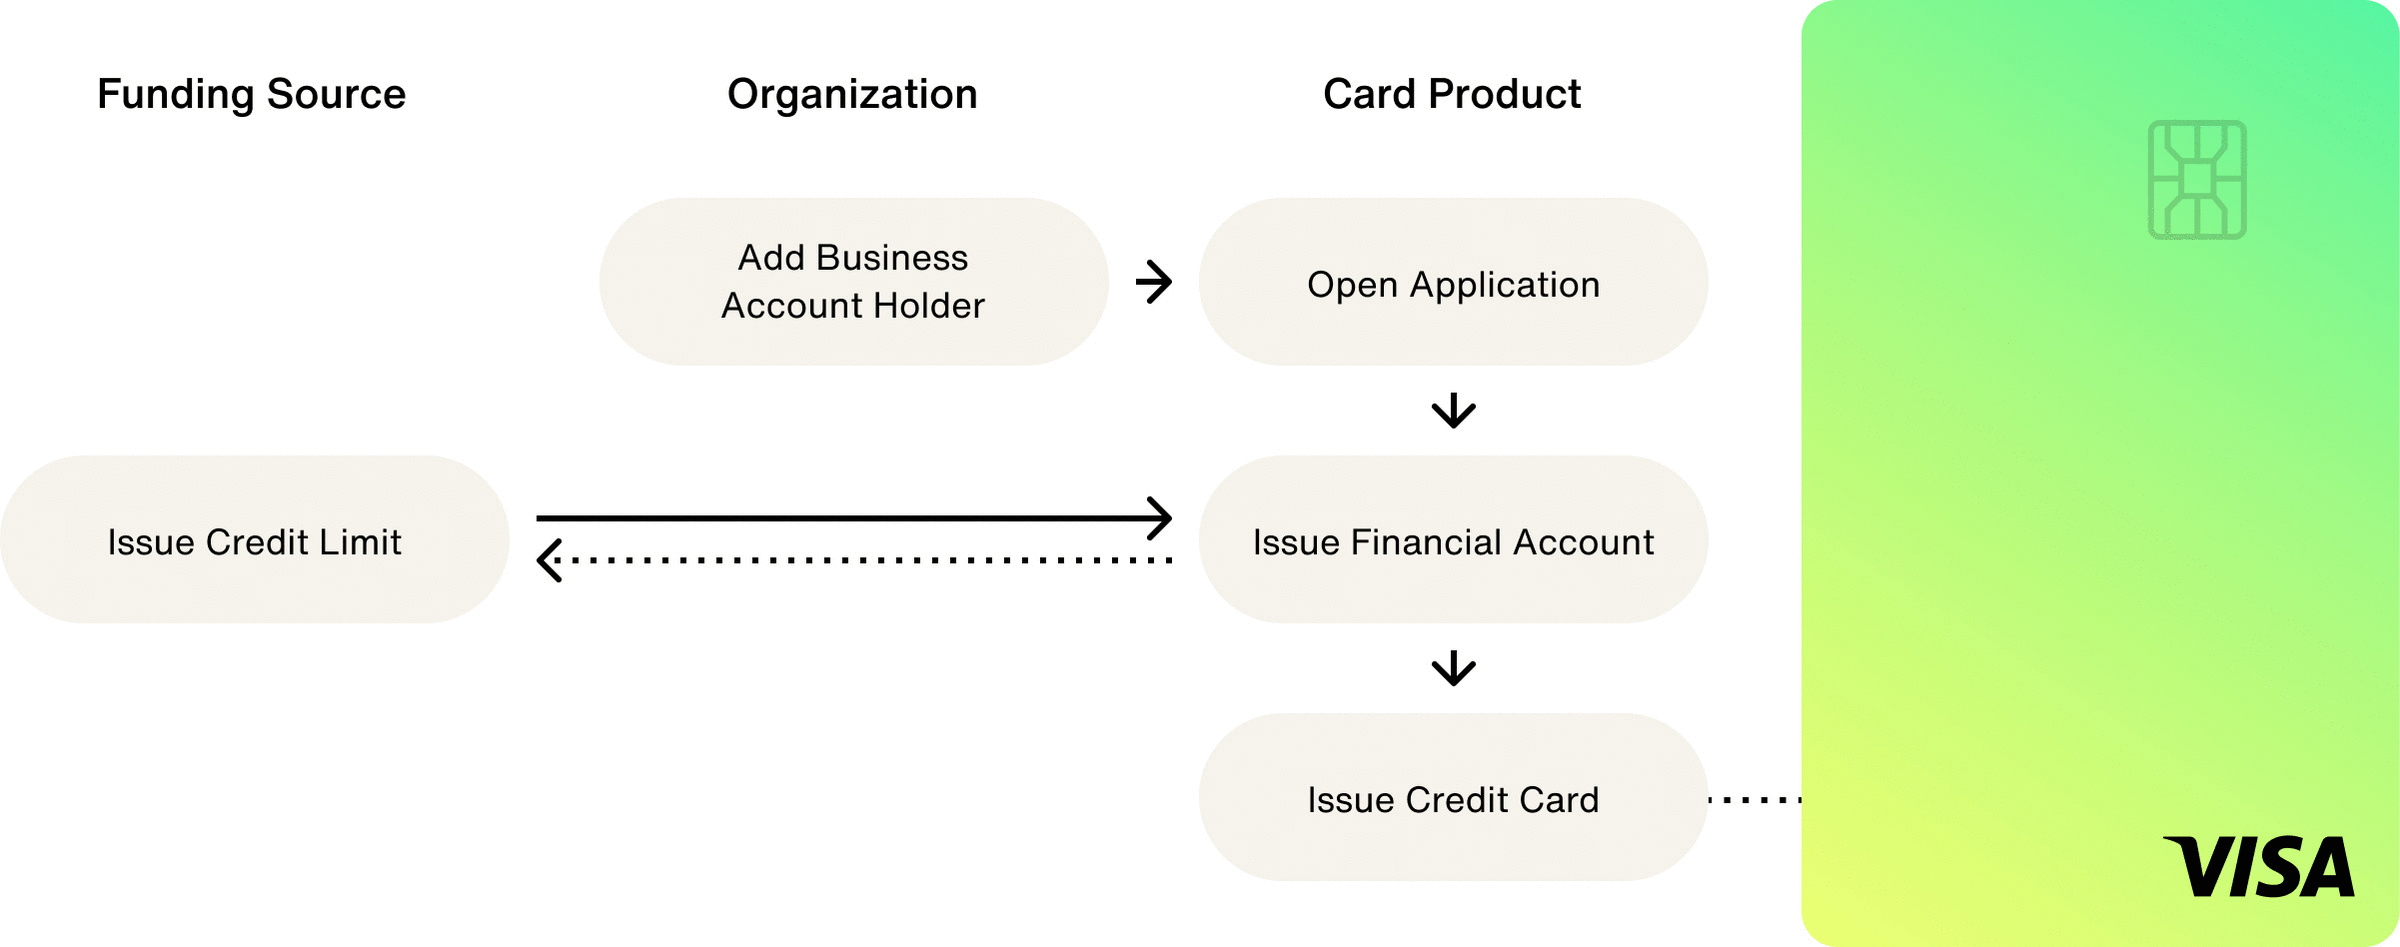
You can create a Business Account Holder from the Highnote Dashboard and GraphQL API. When creating an Account Holder, there are optional creditRiskAttribute fields that you may want to provide as inputs to a credit application. annualRevenue is one optional field that can be collected on an Account Holder to be used in your application credit decisioning and simulate application credit decisions in the Test Environment.
Use the following mutation to create a Business Account Holder:
Once you have created a Business Account Holder, you can open an Application to onboard them to your Card Product.
Opening an Application triggers identity verification checks and any applicable credit policies necessary for your Card Product. Your Card Product will define the required Application fields for identity verification and credit risk underwriting. These checks must pass in order to onboard the Account Holder. To create the Application, you need the cardProductId and accountHolderId.
To simulate credit line assignments or Adverse Action reasons on your Credit Card Product in the Test Environment, you must include a specific annualRevenue on the Account Holder before creating a Card Application. See the Simulate Credit Line Assignment and Simulate Adverse Action Declines for more information.
Use the following mutation to create an Account Holder application:
The Test Environment does not run KYB (Know Your Business) and KYC (Know Your Customer) checks on Applications. When testing, you can simulate Application failures under a variety of scenarios by creating Account Holders with specific attribute values. The simulation will produce Tags associated with the application decision and provide information as to why an Application outcome was APPROVED, IN_REVIEW, or DENIED.
When simulating credit line assignment, do not use any of the failure values outlined in the Simulate Verification Status guide. Using a failure value results in a DENIED application response. An application must be simulated for approval for a credit line assignment to be provided in the response.
If the annualRevenue value provided is not a value outlined in the following table, an approved application will have a $1,000 credit limit by default.
For Credit Card Products, your credit policy may allow for dynamic allocation of credit limits for approved applications. Using the Test Environment, you can test various credit line assignments on APPROVED application responses. To test credit line assignment, open an application and provide specified values for annualRevenue for Business Account Holders, or totalAnnualIncome for Person Account Holders.
The following table displays Credit Line assignments based on different annualRevenue values in the Test Environment:
| Field | Value | Credit Line Assignment |
|---|---|---|
annualRevenue or totalAnnualIncome | $1,000,000 | $1,000 |
annualRevenue or totalAnnualIncome | $10,000,000 | $10,000 |
annualRevenue or totalAnnualIncome | $100,000,000 | $100,000 |
Opening an Application on a Credit Card Product in the Test Environment allows you to test various Adverse Action reasons on a DENIED response. Testing Adverse Action reasons consists of the following steps:
- Create a Business Account Holder in your Test Environment.
- Provide specified values on the
legalBusinessNameand/orannualRevenueinputs. - Create a Card Product application for the Business Account Holder. The
annualRevenueandlegalBusinessNamevalueswill be used when you create an application.
In the Live environment, a DENIED Application may have 1 or many associated Adverse Action reasons, which must be provided to the customer.
The following table contains examples of specified values and Adverse Action responses.
| Field | Value | Adverse Action Response |
|---|---|---|
annualRevenue | $1.00 | INSUFFICIENT_INCOME Income insufficient for the amount of credit requested |
annualRevenue | $2.00 | DELINQUENT_CREDIT_OBLIGATIONS Delinquent past or present credit obligations |
annualRevenue | $5.00 | INSUFFICIENT_INCOME DELINQUENT_CREDIT_OBLIGATIONS |
legalBusinessName | DECLINE | UNABLE_TO_VERIFY_IDENTITY Unable to verify identity |
Use the following query to create a Card Product application for a Business Account Holder in your Test Environment and simulate an Adverse Action decline:
Financial Accounts hold the balance for Payment Cards. To create a new Financial Account, pass the id of a verified Application.
Financial Accounts have an externalId variable field that allows you to tie the Financial Account to an entity in your system. If you do not pass in an externalId, Highnote will generate one.
Use the following mutation to issue a Financial Account for an Application:
Setting or updating a credit limit is an asynchronous process with the Highnote team to ensure your ledger balances and validations are in check.
For Product verticals like Credit or Fleet, you can create a credit limit on your Account Holder's Financial Account based on your underwriting criteria, agreements, and product guidelines. The credit limit establishes a maximum spending limit for a given period, and authorizations exceeding the credit limit will be declined.
Once you have created a credit limit, you have the flexibility to update credit limits as you factor in new information, such as changes in your customers' financial situations.
As part of this feature, Highnote tracks the total credit extended to your Account Holders' Financial Accounts and ensures the extended credit does not exceed your Card Product’s limits.
You can use the following mutation to set and update a credit limit:
After creating and funding a financial account, you can issue a payment card to the account holder. All payment cards start as virtual cards with the option of ordering them as physical cards.
For more information on issuing cards, see the Issue Cards guide.
You may only submit one order for a given payment card. If the order is canceled or fails, you may try again for the same card. However, if an order is successful and you need another physical card, you will need to issue a new payment card.
Once you have issued a payment card, you can create an order for a physical card. When ordering a physical card, you can ship to the account holder's address on file or specify a different shipping address.
Physical card orders require:
- Card personalization details
- Shipping address
- Requested ship date
- Shipping method and signature requirements
You can create individual physical card orders using the following mutation. To create a group card order, see Print Cards in Bulk.
Selecting the number or cvv fields requires that you are PCI compliant.
Highnote recommends using the Card Viewer SDK to securely display payment card data and and reduce PCI burden.
To display an account holder's primary account number (PAN) and security code (CVV), you can use the API to fetch them using the following query:
Recurring payments (or automatic payments) and one-time payments are used for Card Products which require a payment to be made by the Account Holder on a regular cadence. You’ll need to provide your Account Holders with the ability to make payments towards their outstanding or statement balance.
To schedule a repayment, an Account Holder must connect a verified, external bank account. Highnote has partnered with Plaid and Finicity as secure options for your Account Holders to verify and link their external accounts. Once linked, Account Holders can seamlessly transfer funds (via ACH) between the Highnote Financial Account and the external bank account. Prior to creating a payment schedule, you learn how to test connecting an external account via Plaid or Finicity from the Connect External Accounts Guide.
A Recurring Payment schedule can be set on a monthly frequency so that your customer’s can schedule payments on their due date each month or on a customized calendar day. Recurring payment schedules are based on a point-in-time balance, such as Outstanding Balance, and the ACH transfer amount will be calculated on the scheduled date.
A Recurring Payment schedule can be set on a monthly frequency so that your customer’s can schedule payments on their due date each month or on a customized calendar day. Recurring payment schedules are based on a point-in-time balance, such as Outstanding Balance, and the ACH transfer amount will be calculated on the scheduled date.
Highnote provides the data necessary to create a statement for a Financial Account, which you can leverage to populate your own statement template and provide to your customers.
Billing statement data is created on Financial Accounts and becomes available at the end of a billing cycle. For Credit Card products, the billing period end date may vary across Financial Accounts on your portfolio. Statement data is typically available within 48 hours of a billing period end date.
You can query the latest billing statement data for a Financial Account to generate the Account’s statement in the latestClosedStatement. Billing statements will only include posted transactions and the associated balances for a given billing period. Transactions for the Financial Account’s current billing period and their next, upcoming due date can be found in the currentOpenStatement.
When there is a balance due on the Financial Account, the currentAmountDue will be updated based on credits (e.g. payments, refunds) to the Financial Account between the billing period end date and the due date. You’ll need to reference the type of CreditPayInFullCardFinancialAccountStatementSnapshot to retrieve the current amount due, based on your Card Product. You can present this balance to your customer outside of the statement itself so they are informed on the remaining amount owed since their last statement was generated.
In the Test Environment, you can end a Financial Account’s billing period early so you can simulate a billing period’s statement without waiting for the billing period to end.
The new period must be at least 60 seconds in the future, and if the periodBoundary is not supplied, the statement endPeriod will be set to 60 seconds in the future.
In the Test Environment, you can roll over a Financial Account’s billing period to the next billing cycle so you can simulate ending and starting a new billing cycle for a Financial Account. Rolling over to the next billing period allows you test and view how the statement data for a closed billing period is calculated without waiting until the actual calendar day for the billing period to close.
For more information on generating or searching for billing statements, see our Billing Statements Guide.
Once you've completed the basics of setting up your card product, you can expand and test your integration further:
- Simulate transactions in the Test Environment to ensure your integration works.
- Create Spend Rules to control the way your cards can be used.
- Setup Notifications to automate your integration.